REVIEW · SAN DIEGO
San Diego Indoor Skydiving Experience with 2 Flights & Personalized Certificate
Book on Viator →Operated by iFLY Indoor Skydiving · Bookable on Viator
You can fly without leaving the ground. At iFLY San Diego, you step into an 800-horsepower wind tunnel and learn to float on a wall-to-wall cushion of air, reaching wind speeds of 130 to 175 mph. What I like most is the real one-on-one coaching with a certified flight instructor, plus the setup that makes it beginner-friendly even if you’ve never done anything like this. The main drawback to plan for: the time you’re actually airborne is short—two flights total about 2 minutes—so go in with the right expectations.
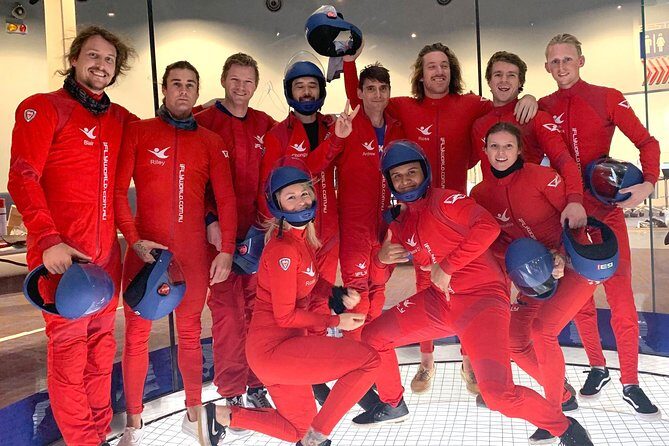
The visit runs about 75 minutes from check-in to finish, with sessions that handle small groups (up to six people in the training flow, and up to 12 total in a session) and multiple flight times so you can fit it into a day in Mission Valley. Based on the instructor names that show up in feedback like Dave2, Alex, Eddy, John, and Luke, the staff puts a lot into comfort and confidence, not just theatrics. If you want to watch without flying, there’s an observation area—just arrive 10 to 15 minutes early so you don’t lose momentum.
In This Review
- Key Highlights to Know Before You Go
- Arriving at iFLY San Diego: The Mission Valley Setup
- The Training Session: How You Learn to Float (Without Jumping)
- Two Flights, One Big Learning Curve: What That 60-Second Air-Time Feels Like
- Wind Speed, Higher Options, and Why Time Can Feel Tight
- Gear, Clothing, and the Stuff That Makes It Easier
- Safety Rules You Should Actually Read
- Price and Value: Is $125 Worth It?
- Who Will Love This Most (and Who Might Not)
- Should You Book This Wind-Tunnel Flight in San Diego?
- FAQ
- How does the wind-tunnel flight experience work?
- Do I need experience to fly?
- How long is the experience from start to finish?
- How long is each flight inside the tunnel?
- What is the minimum age to participate?
- Are there weight limits for flying?
- Is it scary, and do I feel like I’m falling?
- What should I wear?
- Can I watch if I don’t want to fly?
Key Highlights to Know Before You Go
- Two instructor-led flights (60 seconds each) gives you a quick second chance to improve your position.
- Small-group training flow means you’re not stuck in a cattle line while people watch and wait.
- Wall-to-wall airflow helps keep you from dropping, so it feels more like controlled floating than falling.
- Wind speeds up to 130–175 mph deliver the adrenaline, while the setup keeps you safely supported.
- Personalized certificate of flight achievement makes it a fun souvenir beyond photos.
- Tight “what to wear and remove” rules (bracelets, loose jewelry, long hair) help the suit and helmets stay secure.
Arriving at iFLY San Diego: The Mission Valley Setup
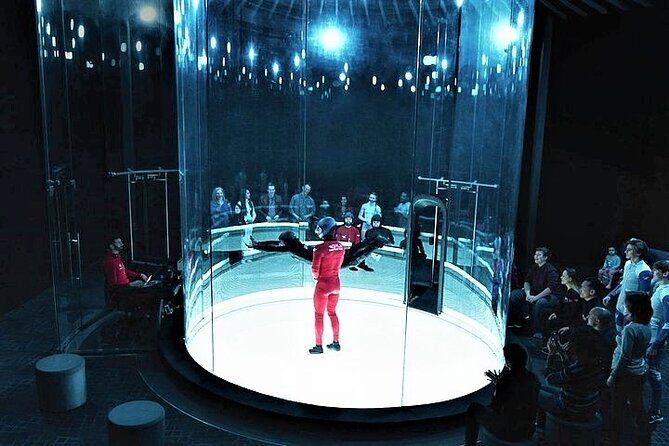
Your session starts at iFLY San Diego in Mission Valley, 2385 Camino Del Rio N, San Diego, CA 92108. This matters more than you’d think, because wind tunnel flights run on a tight schedule. Arrive 10 to 15 minutes early so you can check in, get outfitted, and start training on time.
Check-in includes your gear fitting and a quick pre-flight process before the instructor takes you through the stance and hand positioning. You’ll also see the flow of the operation: operators monitor readiness, then the tunnel team ramps things up gradually when your flight is about to begin. It’s controlled, fast, and very “safety first,” even when your brain is already thinking about the adrenaline part.
If you’re coming with family or friends, you can usually watch from the observation area. That’s a plus for groups with mixed comfort levels—some people want to fly, some want to spectate, and everyone gets their moment.
Other San Diego tours we've reviewed in San Diego


The Training Session: How You Learn to Float (Without Jumping)
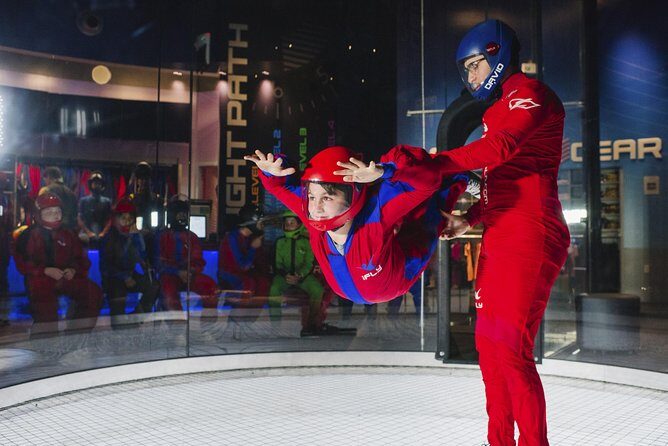
Before you get air-time, you’ll do a specialized training session with an accredited flight instructor. The goal is not to teach you to “do tricks.” The goal is to help your body learn the basics of stable flight so you can comfortably float in a vertical wind tunnel.
The tunnel itself uses a powerful vertical airflow system: air gets pulled through the flight chamber, then sped up into a smooth column. You’ll feel that air cushion as soon as the wind speed increases. The operator doesn’t just crank it instantly; they increase it slowly until you and your instructor are airborne, so your body can adapt.
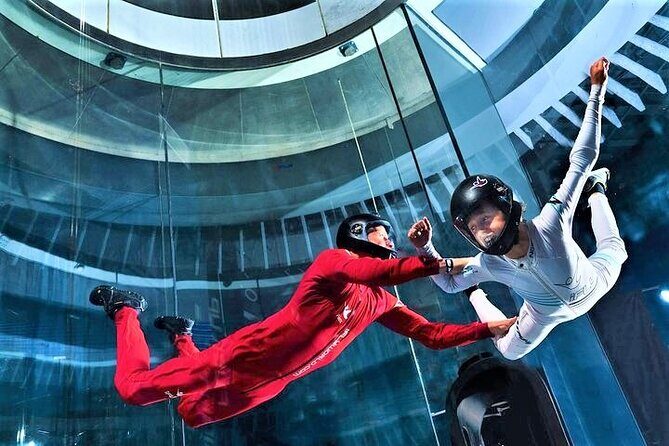
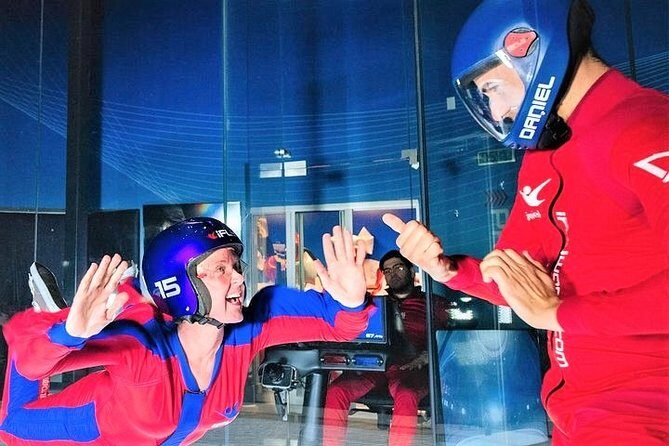
Here’s what that coaching really means for you. First, you’re learning a stable body position instead of flailing around. Second, your instructor is right there the whole time, so you’re not guessing what to do with your hands, your posture, or your breathing.
Based on the kind of feedback that comes up around instructors, the best sessions are the ones where you treat training like a warm-up for confidence. If you listen closely during the practice portion, your second flight tends to feel easier than your first. You’re not “behind,” but you do want to get your basics down before the wind speeds up.
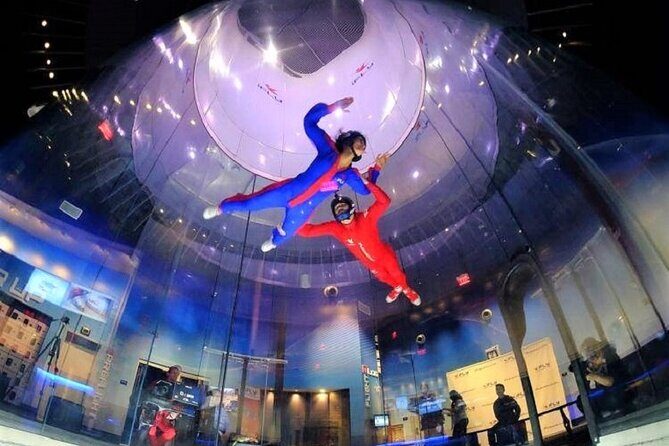
Two Flights, One Big Learning Curve: What That 60-Second Air-Time Feels Like
You fly one-on-one with your instructor for about 60 seconds, and you do it twice. Yes, that means your total airborne time is roughly 2 minutes. That sounds short—until you’re in the chamber and realize your brain is processing speed, balance, and breathing all at once.
In the wind tunnel, you’ll reach speeds between 130 and 175 mph. The wall-to-wall airflow is what keeps you from dropping like you would in real free-fall. Instead, you feel the tunnel’s stable pressure holding you up while you focus on staying positioned.
What makes this work for beginners is that “stability” is built in. You’re not being asked to jump or land. You’re being asked to float while the instructor guides you. The best way to enjoy those seconds is to treat them like a controlled skill drill: stay relaxed, keep your body in position, and let your instructor do the “spotting.”
One small tip from real-world experience: pay attention to your helmet and fit. There are plenty of first-timers who get surprised by how active the airflow feels on your head and hair. If anything looks loose during setup, speak up right away—fast adjustments can save you from a distracted flight.
Wind Speed, Higher Options, and Why Time Can Feel Tight
The basic plan is clear: two flights of 60 seconds each. What can catch people off guard is how “higher” or extra intensity can affect what you’re able to do inside your booked session. Some add-ons (like going higher/faster) may come with additional cost, and in at least one case it was described as pulling time from your existing flight setup.
So here’s my practical advice: decide what you want most before you show up.
- If your priority is the full “first flight plus improvement,” stick with the included flights and focus on mastering the basics.
- If your priority is maximum intensity, ask staff what options are available that day and how they affect your flight timing.
Also, pictures and video are often sold as add-ons at facilities like this. The value depends on what you want. If you just want the memory, your certificate and the sensation of flying may be enough. If you want action footage, know you may be spending extra beyond the base price.
Either way, go in expecting a fast session. The wind tunnel experience is high-adrenaline and short by design, and it’s better that way than a long, waiting-based event.
Gear, Clothing, and the Stuff That Makes It Easier
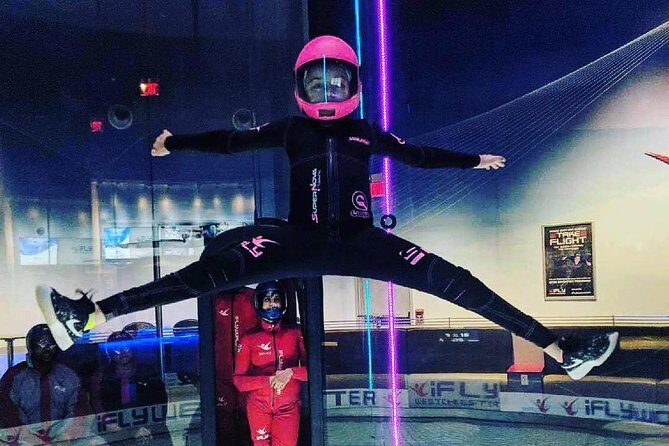
You’ll wear a flight suit over your clothes and use all required gear during the session. The venue recommends well-fitting, lace-up sneakers or running shoes and comfortable clothing, preferably pants and a shirt without a collar. The collar part matters because collars can interfere with fit and comfort under the suit.
If you have long hair, plan on styling it so it doesn’t float around. Braided hair or a low bun is the common approach. Empty your pockets too—anything loose can shift around, and the staff will want you stable in the chamber.
You’ll also need to remove items that can flap or become loose, like jewelry (rings, bracelets, necklaces), watches, and hair accessories. Lockers are available, but the simplest move is to leave valuables at home.
Can you wear glasses? Yes—larger goggles are available that fit over eyeglasses. That’s a big deal for people who hate contact lenses, so if you’re one of them, you’re not stuck.


Safety Rules You Should Actually Read
This is where the experience becomes more than adrenaline. iFLY won’t allow certain medical situations or body conditions, and it’s worth checking before you schedule.
You won’t be able to fly if you have previous neck or back injuries, heart issues, shoulder dislocations, are pregnant, or are wearing a hard cast. There are also strict weight limits: you must weigh less than 300 lbs. People between 260 and 300 lbs may require additional evaluation by local staff, and availability can change based on safety needs.
There’s no height restriction. The minimum age is 3 years, and there’s no upper age limit listed. Kids under 18 must have a parent or guardian sign the waiver.
If you’re traveling with someone who has physical or cognitive challenges and wants to experience the tunnel flight anyway, you can contact the provider after booking to request a certified instructor to guide All Abilities flyers. That’s a strong option if you want real participation, not just watching from the sidelines.
Price and Value: Is $125 Worth It?
At $125 per person, you’re paying for a lot that most DIY activities don’t include: certified instruction, full gear use, training time, and two flights plus a certificate of flight achievement (your listing also calls it personalized). Local taxes are included too.
What you should weigh is time value. You’re paying for a total about 2 minutes of airborne free-fall-style sensation, but you also get a full coaching session and the safety infrastructure that makes it beginner-safe. If you’ve ever tried to buy thrill-seeker fun and ended up with half your time waiting around, this setup tends to feel efficient.
If you’re comparing costs, consider the “real cost drivers”:
- Included flights: two 60-second sessions
- Coaching: instructor one-on-one while you learn
- Gear and tunnel time: built into the session price
- Add-ons: higher/faster options and optional photo/video packages are separate
So is it worth it? For me, yes—if you go in for the experience of learning to fly safely and want that concrete second chance on flight number two. If your main goal is lots of time in the air, you might feel shorted because it’s intentionally brief.
Who Will Love This Most (and Who Might Not)
This wind tunnel flight is a great fit if you want a memorable, controlled thrill with low risk and high guidance. It’s also perfect for groups, because a session can handle small numbers and you’ll be flying one at a time while friends can watch from the observation area.
It also works for a wide age range. The minimum age is 3, and there’s no upper age limit listed—so long as the safety rules are met. That’s why you’ll see families plan this as a shared “bucket list” moment where everyone gets coaching.
You might want to reconsider if you have medical restrictions listed earlier, or if your schedule allows only one shot and you’d rather not commit to learning basics in a short time window. And if you’re the kind of person who hates feeling rushed, the tunnel’s fast timeline may not feel relaxing—even though the flight itself is guided.
Should You Book This Wind-Tunnel Flight in San Diego?
Book it if you want a safe way to experience real flight feelings without jumping from an airplane, and you’ll appreciate the structure: training first, two flights second, certificate at the end. I’d especially recommend it if you like “learn fast, do it again better” experiences.
Skip it if $125 is a stretch and your main priority is long airborne time. This place is about quality coaching in a controlled environment, not marathon flight minutes.
One last practical note: the venue offers free cancellation up to 24 hours before the experience start time, so if your schedule is fluid, you have some flexibility to lock it in without too much stress.
FAQ
How does the wind-tunnel flight experience work?
A vertical wind tunnel uses fans to draw air through the flight chamber and push it back down the sides, creating a smooth column of air that helps you float. The air is compressed and sped up before it reenters the chamber.
Do I need experience to fly?
No experience is necessary. You will take a required training session first, and your instructor will guide you throughout your flights.
How long is the experience from start to finish?
It’s about 75 minutes total, with an overall first-time flyer experience listed at about 1 hour and 30 minutes from start to finish.
How long is each flight inside the tunnel?
Each wind tunnel flight lasts about 60 seconds, and first-time flyers do it twice.
What is the minimum age to participate?
The minimum age is 3 years.
Are there weight limits for flying?
Yes. You must weigh less than 300 lbs. Flyers between 260 and 300 lbs may require additional evaluation by local staff, and accommodations may not always be possible.
Is it scary, and do I feel like I’m falling?
It’s generally not scary. There’s no jumping and no falling—your instructor keeps you stable in the air, and the experience is designed for controlled floating.
What should I wear?
Wear well-fitting lace-up sneakers or running shoes and comfortable clothes. It’s recommended to wear pants and a shirt without a collar.
Can I watch if I don’t want to fly?
Yes. If someone chooses to watch, they can accompany you and watch from the observation area.